
This DIY burlap table runner tutorial contains affiliate links.
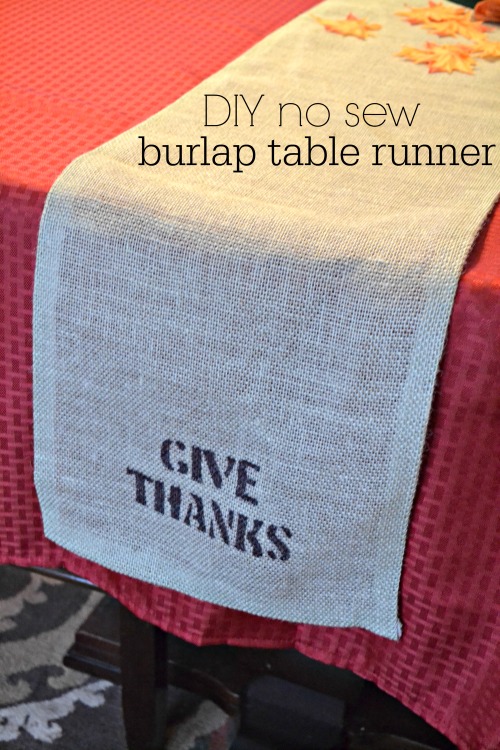
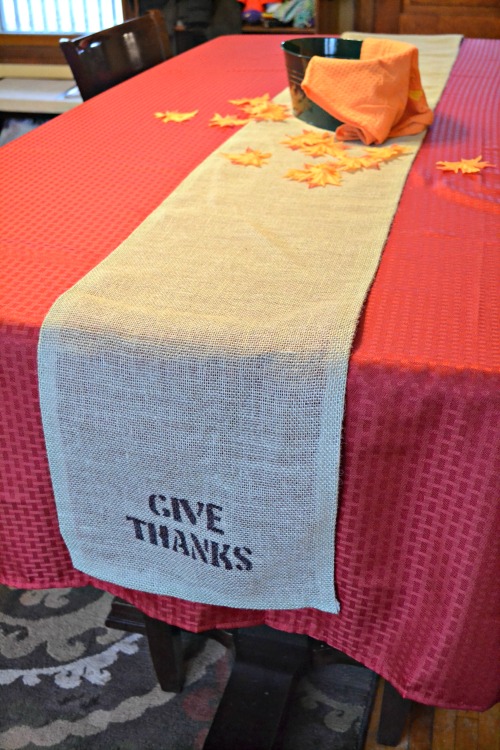
I knew I wanted our Thanksgiving, or #Fakesgiving as I like to call it, to have some sort of pretty tablescape. I wanted something simple, and I thought a burlap table runner would be perfect. I wasn’t able to find a burlap table runner on short notice, and I bet if I did it would be quite pricey. So I decided to make one myself. This Thanksgiving table runner was a really easy project, that’s coming from me, and I’m not a crafty person at all. These are easy enough to make that you can have one for each season!
What you’ll need:
Burlap
Iron-on hem tape
Seam Ripper
Sharpie Marker
Iron
I’m not crafty at all, so I thought that I would be able to just cut the burlap and be good to go. I quickly learned that burlap is a little different to work with. In order to cut the burlap fabric you first have to find where you would like to cut the material (add some extra material to account for the fabric you’ll fold over and hem to make smooth edges.) Once you know where you want to cut, start to pull out the fiber that runs all the way across that spot. It might break as you go so you can use a seam ripper or sharp object (I used the end of a scissors) to pick the seam out again. Once the fiber is out you’ll be able to cut your burlap straight.
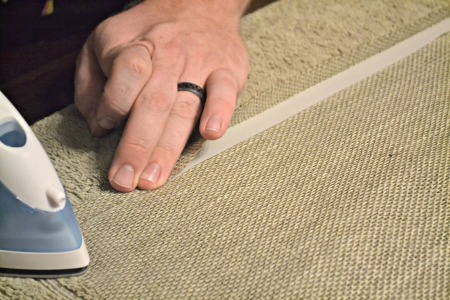
After your burlap is cut you’ll want to iron the edges over to account for the Iron-on hem tape. Our hem tape was 3/4″ so we folded in each edge 3/4″ and ironed it. Then we were able to slip the hem tape in really easily then iron that down. AJ helped with this step, because I’m super clumsy. Repeat on all four sides and you have yourself a burlap table runner!
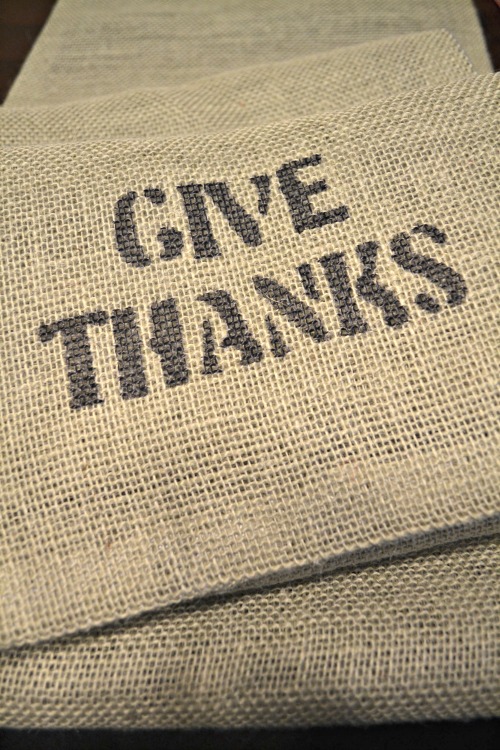
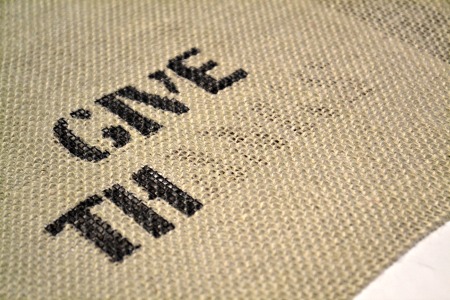
For the design I printed out the words “Give Thanks” with the font we chose. Since the burlap is pretty transparent you can just slip the printed paper underneath, secure it with tape and use it as your template. You’ll want to use the Sharpie and “dot” the Sharpie onto the burlap rather than just draw, it’ll work better with the fibers.
This was such an easy project, and I ended up with a lot of extra burlap. I will definitely be making one of DIY burlap table runners again in the near future!
Written by, Brittany, the geek behind the blog. Sharing tips and stories from the trenches on navigating life homeschooling and homesteading as a stay at home mom.